The Ultimate Southwest USA Road Trip

Mesa Arch, Canyonlands National Park
The Southwest is such a beautiful and unique area in the US and you should definitely pay it a visit at least once! The best way to do that is by going on a road trip. You can rent a campervan or just take your own car and tent camp (like I did). I recommend taking at least two weeks to do this trip, but feel free to make any modifications as needed.
About This Road Trip
Getting There
There are a few different places you can fly into to start this trip. The closest airports are located in Las Vegas, Salt Lake City, Phoenix, Flagstaff, Los Angeles, or Denver.
When to Visit
The best time to do a Southwest road trip is in the Spring or Fall. Temperatures in the Summer can be extremely hot and Winter temps often fall below freezing. You should still be prepared for all kinds of weather, though, as days are often warm with cold nights in the desert.
Costs & Fees
The entrance fee to each national park costs $20–$35 per vehicle. To save money, buy an America the Beautiful Pass for $80 and get unlimited access to all the US national parks and monuments for a whole year! You can buy a pass at the entrance gate to any of the national parks, or order one online here.

Canyonlands National Park

Valley of Fire State Park
Two Week Southwest Itinerary
Since this southwest road trip is a loop, start and end your itinerary trip wherever you’d like! I travelled to the southwest from Colorado so this guide is written starting and ending in the east.
Day 1: Moab, Utah
Day 2: Moab, Utah
Day 3: Moab, Utah
Day 4: Capitol Reef National Park
Day 5: Bryce Canyon National Park
Day 6: Zion National Park
Day 7: Zion National Park
Day 8: Valley of Fire State Park
Day 9: Sedona, Arizona
Day 10: Sedona, Arizona
Day 11: Grand Canyon National Park
Day 12: Page, Arizona
Day 13: Monument Valley
Day 14: Travel home
Map
Moab, Utah
It’s a good idea to spend three nights in Moab, Utah to see all there is to see in this gorgeous area! Moab is home to two of Utah’s National Parks (Arches and Canyonlands) as well as the scenic Dead Horse Point State Park. With three nights in Moab, you’ll have plenty of time to explore each park!
Where to Stay in Moab
Moab is a busy little town with lots of places to camp and stay. If you are visiting in the Spring or Fall, consider camping because the weather will be very nice. In the Summer or Winter, you might want to find a hotel with either AC or a heater.
Camping in Moab
There are plenty of places to camp in Moab. In fact, there are many free campgrounds in and around the town! Here is a link to a map of many of the free and cheap camping options in Moab. I stayed at Horsethief Campground because it was close to Dead Horse Point and Canyonlands. This campground is a little out of the way of Arches National Park but you can decide if you’d prefer to change campgrounds while you’re in Moab, stay at a more central location, or just have a little bit more driving on one of your days.
Hotels in Moab
There are so many choices for hotels and motels in Moab. Here are just a few:
Hoodoo Moab (luxury)
Mainstay Suites Moab (mid-range)
Adventure Inn & Motel (budget)
Day One: Arriving in Moab & Dead Horse Point State Park
You’ve made it to Moab! The main attractions here are, of course, the parks but the town itself is still worth a brief visit. Head to the Moab Brewery for great beers (and to experience Utah’s weird liquor laws firsthand— don’t forget an ID) or stop by Moab Garage Co. for a delicious breakfast or lunch.
Once you are all fueled up, it’s time to check out Dead Horse Point State Park. It costs $20 per vehicle to enter the park, which buys you a pass that’s good for three days. The park is small enough that I felt like I only needed a half day to see what I wanted to see, but it was nice to have the option to return.
Drive to the end of the park (it’s one road in and out) and walk along the West Rim. You can explore as much as you want here but I thought the West Rim was best for catching sunset.


Day Two: Canyonlands National Park
I always love to catch a few sunrises when I’m on a road trip, so what better way to start off your first full day in Moab? Wake-up early and drive into Canyonlands National Park. It costs $30 per vehicle to enter or you can enter for free with the America the Beautiful Pass! There likely won’t be anyone collecting fees at the gate this early in the morning but be sure to pay the fee at the visitor center after sunrise or display your parks pass on your dashboard so you won’t get a citation later on.
Drive to the Mesa Arch trailhead and begin the half mile hike to the arch. This is a super popular place for sunrise so make sure that you are here early enough to snag a parking space. I recommend bringing a headlamp because you will be hiking in the dark at first!
Mesa Arch will likely be surrounded by photographers waiting to get a shot of the sun rising under the sandstone arch. I suggest either arriving early enough to set-up a tripod in front of the arch or watching the sunrise off to the side and waiting for the crowd to clear out before snapping your own photos. I went with the second option, which allowed me to get some great photos of sunrise over the canyon and still capture a shot of the sun under the arch. I’d say you have about an hour after sunrise to photograph the sun under the arch.


Take your time exploring the rest of the park. Grand View Point was a favorite stop of mine. There is a short hike to the viewpoint from the parking lot and the scenery here is incredible! Another beautiful place is Green River Overlook. This is a great place to catch the sunset along with Candlestick Tower.

Grand View Point

Green River Overlook

Grand View Point

Candlestick Tower
Day Three: Arches National Park
If you feel like waking up early again, Delicate Arch is another great place to catch the sunrise (and I highly recommend it). Also, since Delicate Arch is such a popular attraction (it’s on the Utah license plate after all), it can get really busy with people later on in the day— especially at sunset.
The hike is a 2.9 mile out and back trail. Follow the rock cairns (stacks) to stay on trail. As you make your way to Delicate Arch, you will see a small arch called Twisted Donut Arch. This is a great spot to scramble up to to get a nice view of Delicate Arch. Depending on your timing here, you might be able to capture the sun peeking out under the arch!

View from Twisted Donut Arch

Delicate Arch
Next up, head to the Windows Area. From the parking lot you can easily walk to multiple arches including Turret Arch and North and South Window Arches. Across the parking lot is Double Arch, which was another favorite of mine.

Windows

Double Arch
You can spend the rest of the day driving along the scenic road and stopping at viewpoints along the way. Some good stopping points are:
Salt Valley Overlook
Skyline Arch
Delicate Arch Viewpoint
Park Avenue
Fiery Furnace
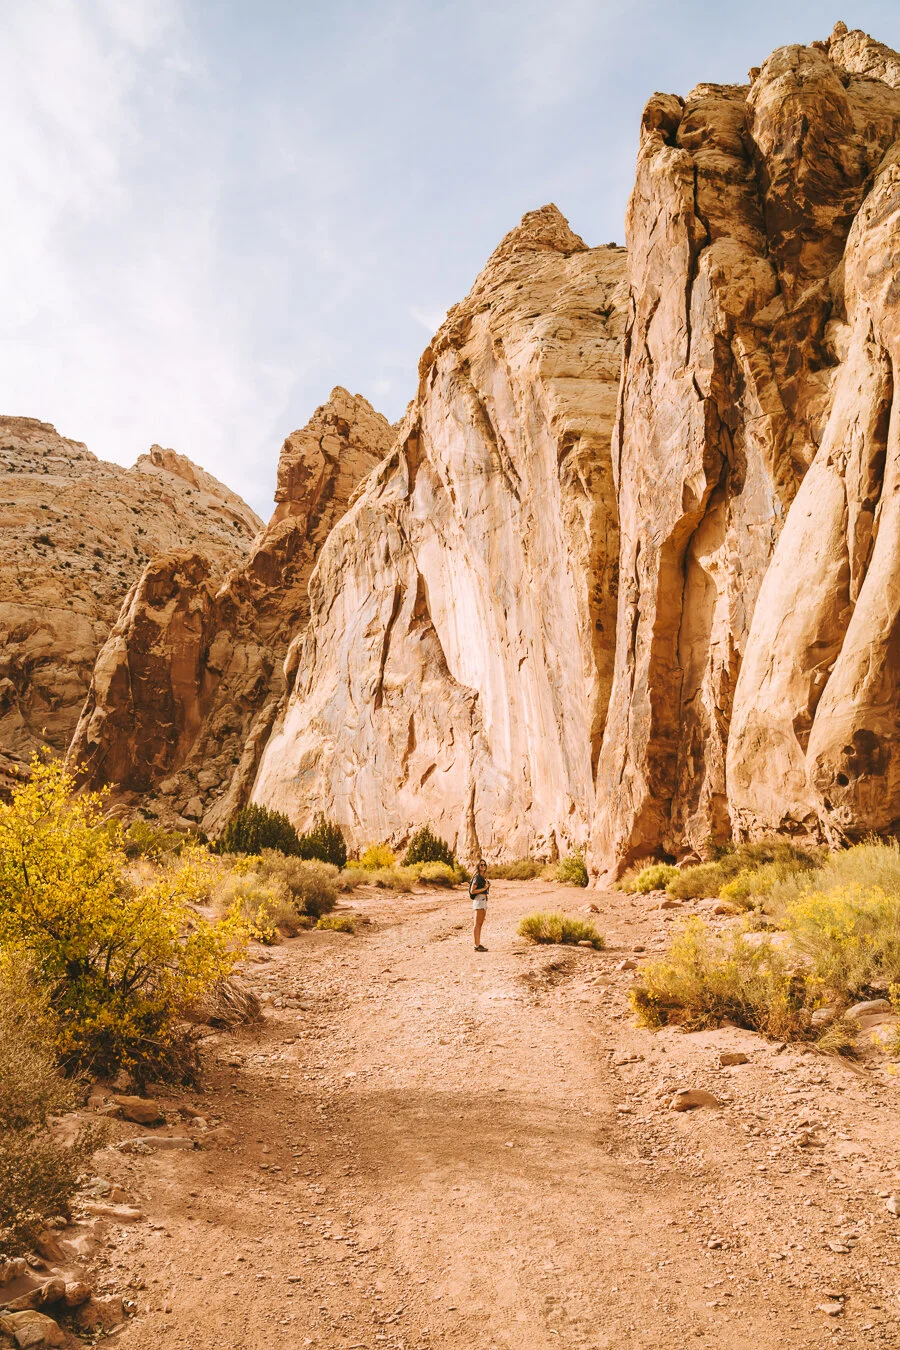
Capitol Reef National Park
Drive Time: 2.5 hours from Moab
Of all five national parks located in Utah, Capitol Reef is the least visited and therefore the least crowded. This is part of the reason why I loved this park so much though! Although this itinerary only includes one night in Capitol Reef, you could definitely spend a few nights here if you have extra time.
Where to Stay in Capitol Reef
Since Capitol Reef isn’t a huge park or near any large towns, you have more limited options for accommodation (you also might want to pick up your groceries in Moab before you get here). Luckily, it’s not difficult to find a place to stay here— especially if you are willing to camp!
Camping in Capitol Reef National Park
Fruita Campground is the only developed campground inside Capitol Reef and is run by the National Park Service. It’s in a beautiful, green orchard area and has all the facilities you would normally expect at a national park campground, however it doesn’t have RV electrical or water hookups. Visit recreation.gov to make a reservation ahead of time.
There are also plenty of free camping options near Capitol Reef. I stayed in a dispersed camping area on BLM land just outside the west entrance to the park. If you take highway 24 towards Torrey, you’ll see an area with campers and RVs on the right side of the road. This spot was great and even had cell service available! If you decide to go the dispersed camping route, just make sure you’re aware that there are no facilities (including toilets) so just be prepared ahead of time.
In addition to these two choices, there are lots of privately owned campsites and rv parks located not too far from the park.
Hotels Near Capitol Reef National Park
Like I said before, there isn’t a lot of developed areas near Capitol Reef. The closest town is Torrey and it’s the best option for you if you prefer to stay in a hotel! Here are a couple of options:
Capitol Reef Resort (luxury)
Broken Spur Inn (mid-range)
Rim Rock Inn (budget)
Day Four: Arriving in Capitol Reef
Since the drive from Moab (or Bryce Canyon if you’re coming from the opposite direction) to Capitol Reef is short, you will have plenty of time to adventure on day one! I recommend the Grand Wash hike, which is a 4.4 mile out and back trail. You can also hike to Cassidy Arch on this trail, which adds about 3 miles to your total.
For sunset, I attempted to drive out to the Temples of the Sun and Moon, which is one of the most iconic features in Capitol Reef National Park. If you haven’t heard of them before, they are two rock formations (one large and one small) located in the remote Cathedral Valley area of Capitol Reef. You can only get to this area via a dirt road and I recommend four-wheel-drive with high clearance to get to this place. The most direct road is the Caineville Wash, which takes about 16 miles to get to the temples. Be sure to check with a ranger ahead of time to find out about the road conditions. When I was here, the ranger told me that there was a ton of sand on the road and they were considering it to be impassable at that time.
I decided that I still wanted to check-out the road and see how close we could get to the temples before needing to turn around. Our Subaru Legacy (AWD with low clearance) made it about 13 miles up the road before we saw the sand and decided to stop driving. In fact, I think that most vehicles could make it up to this point but should not continue. As we drove up the road, we were stopped by multiple other cars warning us about the sand. One Jeep driver told us that he had to help pull a minivan out of the sand but that even most AWD vehicles were getting stuck recently.
We assured everyone that we wouldn’t be driving into the sand but we just wanted to see how far we could get. Once we arrived at the sand, we decided to get out and walk for a bit. It was only 3 miles to the Temples of the Sun and Moon but since the plan was to arrive there a little before sunset, we were losing daylight. In the end, we ended up seeing the Temples from a distance but didn’t get the close-up sunset photos we imagined! Oh well, that’s how it goes sometimes.
Just make sure you check the conditions of the road ahead of time and use your best judgement when deciding to continue driving or not. There is no cell reception out here and the road is not heavily trafficked so be prepared with equipment, water, and food in your car in case you get stuck and have to spend the night.

Can you spot the temple?

Temple of the Sun (it was still pretty far away)
Day Five: Capitol GOrge and Pies
Before leaving Capitol Reef, be sure to drive into Capitol Gorge. The views here are similar to the Grand Wash hike except you can drive your car through the tight canyon! Be sure to stop along the way and take out your camera. The views here are stunning!


The last thing that I believe is a must before you leave the park is to stop at the Gifford House and have a pie. They have so many flavors to choose from and they are small enough to split between two people (or keep all to yourself). Make sure you get a scoop of ice cream to enjoy with your pie.
Bryce Canyon National Park
Drive Time: 2.5 hours from Capitol Reef
The views in Bryce Canyon National Park are stunning and like nowhere else I’ve ever been! If you’re into photography, this park is the perfect place to catch the sunrise and sunset. It also offers beautiful hikes with vibrant scenery. The canyon is made up of hoodoos, which are long, thin towers of rock that have been formed over time by erosion. Bryce Canyon has the largest collection of hoodoos in the world.
Where to Stay in Bryce Canyon National Park
There are plenty of places to stay both inside and near the park. The closest towns to the park are Bryce, Tropic, or Cannonville.
Camping in Bryce Canyon National Park
There are two campgrounds in Bryce Canyon: Sunset and North Campgrounds. North Campground is first-come-first-served and loop A is open year-round. Sunset Campground offers reservations for a few sites May 20 – October 15, is first-come-first-served in the shoulder seasons, and is closed in winter.
Hotels Near Bryce Canyon National Park
If you prefer a hotel to camping, your closest option is The Lodge at Bryce Canyon, which is a historic hotel located inside the park! A few options outside the park are:
Stone Canyon Inn (luxury-ish)
Best Western Plus Ruby’s Inn (mid-range)*
Red Ledges Inn (budget)
*I have stayed at this hotel and enjoyed my time there.
Day Five: Arriving in Bryce Canyon
On your first day in Bryce Canyon, you have a few options for how you might want to spend your time. If you don’t mind a little extra driving, you can make a stop at Mystic Hot Springs to relax for a bit, you can take a hike, or stop at some of the pullouts to take in the view. Here are a few viewpoints you should check-out:
Natural Bridge
Yovimpa & Rainbow Points
Bryce Point
No matter what you decide to get up to during the day, be sure to catch the sunset over Bryce Canyon. Sunrise or Sunset Points (and the area in between) are great options for watching the sunset.

Mystic Hot Springs

Day Six: Sunrise & Hiking Bryce Canyon
Even though I’m sure you just witnessed a fantastic sunset at Bryce Canyon, I encourage you to wake up early to catch the sunrise. The way the canyon is situated makes it the perfect place to view and photograph the morning light. I really liked Inspiration Point for the sunrise views.


Once the sun is up, it’s a great time to take a hike! To get to this hike, you can either walk or drive over to Sunset Point where you will begin the Queens Garden – Navajo Loop. This entire hike only took me an hour and a half with plenty of stops for photos but it might take longer depending on the type of hiker you are. The total distance for this hike is 2.75 miles.
From Sunset Point, you will hike the short distance to Sunrise Point along the Rim Trail (if you started at Inspiration Point, you will have already been walking on the Rim Trail to get to Sunset Point). Once you arrive at Sunrise Point, you will take the Queen’s Garden Trail into the canyon. You will eventually come to a fork in the trail and should follow the signs for the Navajo Loop Trail. You can also follow the Queen’s Garden Trail for the remaining two minutes before the trail dead-ends and then turn around and head back to the fork.
You will meet up with the Navajo Loop Trail in the middle of the loop so now you get to decide if you want to follow the trail to see Wall Street or Thor’s Hammer & Two Bridges. I opted to go the Thor’s Hammer route but I’ve heard great things about Wall Street as well. Not long after passing Thor’s Hammer, you will be back at Sunset Point.


And thus concludes your time in Bryce Canyon (unless you didn’t catch any pullouts from the day before, then I recommend checking out a few before you leave the park).
Zion National Park
Drive Time: 1.75 hours from Bryce Canyon
Zion is one of my top five favorite national parks and is the most popular national park in Utah with 4.3 million visitors annually. You could easily spend 3-5 nights here but I recommend at least 2 to get a good feel for the park and experience some amazing hikes!
Where to Stay in Zion
I recommend staying inside Zion National Park for the best possible experience. You’ll be able to walk to the free park shuttles, the views are amazing, and you will be close to everything you’d want to see.
Camping in Zion National Park
There are two campgrounds in Zion Canyon: Watchman Campground and South Campground. I stayed at South Campground, which is open March 15 to October 31st. You can make a reservation on recreation.gov up to two weeks in advance. Watchman campground is open year-round and takes reservations March–October. Reservations are released online 6 months in advance and fill quickly in the Spring through Fall.
Hotels Near Zion National Park
There is only one hotel located inside Zion National Park (Zion Lodge) but there are a few other places close by in the town of Springdale. Here are a few options:
Cliffrose, Springdale (luxury)
Zion Lodge (mid-range)
Bumbleberry Inn (budget)
Day Six: Arriving in Zion
Once you arrive in Zion National Park, take the afternoon to settle in, set-up camp (if you’re camping), and take in the views. I suggest visiting Zion Canyon Overlook for golden hour and sunset. This is a popular spot in the park so finding a place to park can be a little difficult (especially on the weekend). You will most likely need to park along the road so take care getting in and out of your car. The trail to the overlook is one mile out and back.


If you don’t have shuttle reservations for hiking the next day, be sure to find yourself some wifi or cell service and make a reservation at 5pm MT (more on this below).
Day Seven: Hiking the Narrows
The Zion Shuttle System (Updated for 2021)
In order to access the upper Zion Canyon and the Scenic Drive, you will need to take the shuttle as cars are not permitted to drive on this road during peak season. Due to COVID-19 regulations, you will need to reserve shuttle tickets in advance and will need a shuttle ticket for each day you plan to go up the canyon. A ticket only costs $1 and you may ride the shuttle as many times as you’d like once you are in the canyon.
You can reserve a shuttle ticket in advance from recreation.gov on the 16th and the last day of the month, one month prior to your visit For example, tickets for May 1-15 are released on April 16th. The release time is 9am MT and I recommend reserving your tickets at that exact time in order to secure them.
If you miss out on advance tickets, there is a secondary reservation window at 5pm MT one day in advance. You will need to be logged-in to your recreation.gov account in advance and ready to click the reserve button when 5pm hits. If you’ve ever made a reservation for camping in Yosemite Valley or purchased Coachella tickets, you know how quick these things can sell out. Have multiple people in your group try to get tickets to increase your chances of securing some. You may reserve up to 8 tickets at a time.
When you reserve shuttle tickets, you will get to choose an hour window to board the shuttle at the visitor center, after that, you may return on the shuttle at any time. The first shuttle is at 7am. For more information about the Zion National Park Shuttle, click here.
If you are unable to secure shuttle tickets in advance, your last option for reaching the Scenic Drive is to rent bikes. Zion Outfitter offers bike rentals for $35 or e-bikes for $95.
Hiking the Narrows
The Narrows in one of my favorite hikes in the world and although it’s a popular one, I think it is worth navigating the crowds in the beginning. If you aren’t familiar with this hike, it’s through the narrowest section of Zion Canyon and you will be literally hiking in the Virgin River (so don’t think you can avoid getting your feet wet!).
Before you embark on the Narrows, I suggest renting some water shoes and a hiking stick from Zion Outfitter for $29. You can easily walk to Zion Outfitter from camp and get your gear before heading out on your hike. Having this gear will really make it easier to hike in the river without slipping over rocks or hurting your feet.
Start the hike early if you can. The Narrows is so much fun and you will want to spend a lot of time here. The further into the gorge you go, the less crowded it will be. Take the shuttle to the last stop on its route, the Temple of Sinawava and begin hiking.
The entire Narrows Hike is 16 miles long and requires a permit to do the whole thing. The furthest you can hike up the canyon without a permit is 5 miles to Big Springs. You can choose how far up the canyon you hike. Many people choose to hike to Wall Street (about 3 miles in) before turning around.
Narrows Closures
Sometimes the flow of the Virgin River will be too high and the Narrows Hike will be closed. You can click here to check the current flow rate. If the flow is above 150 cubic feet per second, the Narrows will be closed.
If the Narrows are closed, I suggest doing an alternative hike such as Angels Landing (see below), Observation Point, or The Subway (permit required).
Sunset at Canyon Junction
Since you’ve just had a pretty full day of hiking, you probably won’t be up for more hiking for sunset (unless you’re just crazy about hiking, in which case, you go, dude!). Luckily, Canyon Junction is just a little stop on the side of the road. It has a stunning view of the Watchman, which is beautifully lit by the setting sun.


Day Eight: Hiking Angels Landing
Angels Landing is an iconic hike in Zion National Park. It is known for a portion of the hike that runs along a narrow ridge dotted with chain links bolted into the rock to secure yourself as you hike. If you have a severe fear of heights, I don’t suggest doing the last portion of this trail. However, if you only have a minor fear of heights, I always encourage facing your fears :) (but only if you feel safe).
You will need a shuttle ticket once again to get to Angels Landing as it is located on the Scenic Drive that is closed off to cars. I suggest getting the earliest shuttle possible (at 7am) because the morning light on top of Angels Landing is stunning and you’ll be much more comfortable hiking before the temperature gets too hot. Take the Shuttle to The Grotto to start your ascent.
Angels Landing is 5 miles round-trip and requires 1,488 ft of elevation gain. Be sure to pack lots of water as the trail is steep and pretty exposed. You start the hike on the West Rim Trail before a series of switchbacks that lead to Refrigerator Canyon. After that is Walter’s Wiggles, which are 21 tight and steep switchbacks that take you up to Scout Lookout. There’s a nice view here and a toilet if you need one. The last half a mile is the chains section that follows the spine of the mountain to Angels Landing Summit.


Valley of Fire State Park
Drive Time: 2.5 hours from Zion National Park
The Valley of Fire is located just 50 miles away from Las Vegas, Nevada. The park is filled with red rock formations made from sandstone that light up like “fire” in the sun. You could easily just stop here for a few hours to enjoy the park but the campsites here are quite cool so I recommend staying a night, which also cuts down on your time in the car for the day. It costs $10 to enter the Valley of Fire.
Where to Stay in Valley of Fire
The Valley of Fire doesn’t have much surrounding it so I recommend camping here rather than opting for a hotel. If you’d really prefer a hotel, there’s the North Shore Inn at Lake Mead in the town of Overton or plenty of options in Las Vegas.
Camping in Valley of Fire State Park
There are two campgrounds located in the Valley of Fire: Atlatl Rock Campground and Arch Rock Campground. Both cost $20 per night. Atlatl Rock Campground is open year-round and has 44 sites, all of which are first-come-first-serve. There are three walk-in sites at the back of the main loop that I highly recommend. They aren’t too far away from where you park your car but feel nicely secluded with a place for your tent nestled in between the towering red rocks. Atlatl Rock has flush toilets and showers available.
Arch Rock Campground has 29 sites and is closed during the slow seasons (winter and summer). There’s potable water here but the toilets are vault toilets with no showers. These sites are also first-come-first-serve.
I had no problem finding a campsite here even after hiking Angels Landing and driving from Zion. But I have heard differently from others and it probably depends on the day of the week that you are arriving. If you are unable to secure a site, you can check out some of the campgrounds near Lake Mead or camp for free on a backcountry road in the Lake Mead Recreation Area. Please note that if you take this route, you will be camping without any amenities and will need to follow Leave No Trace Principles (which you should be following anyways).
Day Eight: Arriving in Valley of Fire
After finding yourself a campsite and resting for a bit, head to the Fire Wave for sunset. Make sure you arrive early enough for golden hour and to hike the short distance from the car. The trail is 1.5 miles out and back. This is one of the most scenic places in the park, in my opinion, and is great for photography.


Day Nine: Mouse’s Tank Road
If you are wanting more photography opportunities in Valley of Fire State Park, then head to Mouse’s Tank Road for sunrise. This road is the same one that you took to get to the Fire Wave. As you drive towards the Wave, you will know you’ve arrived when you look behind you and see the view below. There is a pull-off on the side of the road to park.


Those are the main places I recommend seeing in Valley of Fire, but if you’re up for more exploring, check-out:
Elephant Rock
White Domes
Rainbow Vista
Arch Rock
Sedona, Arizona
Drive Time: 5.25 hours from Valley of Fire State Park
Sedona is a magical place that has the mountains, the desert, and the forest all in one area! Many people travel to sedona to experience its energy vortexes, which are found in sacred places known have swirling centers of energy that some people can actually feel! You’ll have to make the visit yourself to experience the energy vortexes firsthand.
Where to Stay in Sedona
Sedona attracts all kinds of people from all over the world and is a well-developed town. So, although there is plenty of camping nearby, there are also many hotel, airbnb, and glamping options.
Camping in Sedona, Arizona
There are a few areas just outside of Sedona that allow camping. I would recommend finding a place to camp in the Coconino National Forest because it’s a beautiful forest and a bit cooler than camping in the desert. I stayed at Cave Spring Campground, which cost $22 per night. You can reserve it on recreation.gov. Some other good campgrounds in the Coconino Forest area are Manzanita Campground (tents only) and Pine Flat.
If you are unable to score one of the above campsites, or if you’d prefer to camp for free, you can camp in a dispersed area. Just keep in mind that these areas have no facilities and you will be required to follow Leave No Trace Principles. You can find dispersed camping to the east of Sedona on Schnebly Road (near Munds Park), to the north on FSR 237 (near Oak Creek Vista), and to the west on FSR 525.
Hotels in Sedona, Arizona
If you are looking for a more luxurious experience, you can’t go wrong with the many hotels and resorts in Sedona. Here are just a few:
Amara Resort & Spa (luxury)
Sedona Real Inn and Suites (mid-range)
The Andante Inn of Sedona (budget)
Day Nine: Arriving in Sedona
Since you’ve just completed the longest portion of driving for this Southwest road trip, you will probably just want to relax when you arrive in Sedona. Take the rest of the day to set-up camp, have a nice meal, or walk around town.
Day Ten: Cathedral Rock
For a full day in Sedona, I suggest doing a morning and an evening hike while the temperature isn’t too hot. First, head to the Birthing Cave. The trail is two miles out and back and begins at Long Canyon Trailhead. The hike itself is pretty flat and relatively easy. When you get to the cave, you’ll notice that although it’s big, it’s not very deep. In order to get a photo of the entire opening, you’ll need a very wide angle lens or to take a pano and stitch the images together (what I did).

This shot was composed of 18 seperate photos

What most shots of the cave opening will look like
In the afternoon, I suggest exploring the town of Sedona for a little bit. Have some lunch or do a little shopping. The town is very cute so I definitely recommend checking it out.
For golden hour and sunset, head to Cathedral Rock. This was probably my favorite place to visit in Sedona and is the perfect spot to watch the sun go down. It’s also one of the areas where you can feel the energy vortex. You’ll often see people meditating here.
There are a few different ways to access this hike but the most direct way is to start at Cathedral Rock Trailhead. I would suggest getting here early to find parking. This trail can be very popular, especially right before sunset. You will need a Red Rocks Pass to park here, which can be purchased for $5 or you can use an America the Beautiful Pass (national parks pass).
The trail is just 1.4 miles out and back but is steep with 645 ft of elevation gain. You may also need to do a bit of rock scrambling in some areas. Make sure you bring shoes with good traction!
Once you get to the top, there is space to spread out to the left and right. Do a little exploring to get different views of the “cathedral.” When you head back down, it might be dark so be sure to pack headlamps just in case.


Day Eleven: Devil’s Bridge
Are you ready for another sunrise hike? The Devil’s Bridge is one of the most popular trails in Sedona so I recommend visiting at sunrise not only because the lighting is nice, but to avoid the crowds. When I did this hike at sunrise, there was still a decent sized group of people here. The parking lot is small so I cannot stress enough that getting here early is key.
The hike to the Devil’s Bridge is 4.2 miles out and back. Park at the Devil’s Bridge Trailhead and begin hiking up Dry Creek Road. If you have a high-clearance 4x4 vehicle, you may be able to drive further up this road, cutting down your hiking time. But the road is rough so I only suggest doing this if you have the right vehicle and are confident in your off-roading skills.
Once you make it to the top, enjoy the beautiful views of the bridge and surrounding red rocks. You are allowed to walk across the bridge (it’s wider than it appears in photos) but be cautious— there is a 75 ft drop off the sides.


After your sunrise hike and breakfast time, you might want to take a dip in Oak Creek to cool off from the midday heat. There are a few lesser known swimming hole spots you can find but if you’d like to visit one of “America’s top swimming holes,” you should check out Slide Rock State Park, which features an 80 ft long natural sandstone slide! The park costs $20 per vehicle to visit.
Grand Canyon National Park
Drive Time: 2 hours from Sedona
Although the Grand Canyon isn’t the deepest or even the longest canyon in the world, it is definitely the most famous. Grand Canyon National Park brings in about 5–6 million visitors every year and is the second most visited national park in the US (after the Great Smoky Mountains). The canyon can be divided into four main areas: the South Rim, Grand Canyon West, Grand Canyon East, and the North Rim. You could spend days (weeks) exploring the Grand Canyon but since time is more limited on an entire Southwest road trip, I suggest you stick to the South Rim.
Where to Stay in Grand Canyon
Being the popular destination that it is, the Grand Canyon has many options for lodging. There are hotels, established campgrounds, and dispersed camping options located inside and near the park.
Camping in Grand Canyon National Park
There are two main campgrounds located inside Grand Canyon National Park: Mather Campground and Desert View Campground. Currently, Mather Campground is the only one that is open in 2021. You can reserve a campsite in Mather Campground on recreation.org.
Just outside of the park is the Ten-X campground, run by the U.S. Forest Service. You can make a reservation here. You can also camp for free and without facilities on the nearby Kaibab National Forest land. Here are the coordinates for the exact spot where I camped off Fire Road 688.
Hotels Near Grand Canyon National Park
There are actually a few different hotels available to book inside Grand Canyon National Park. You can check out those options here. Here are a few other options near Grand Canyon:
The Grand Hotel at the Grand Canyon (luxury)
Best Western Premier Grand Canyon Squire Inn (mid-range)
Red Feather Lodge (budget)
Day Eleven: Arriving in Grand Canyon National Park
Depending on how much time you have after you arrive in the Grand Canyon, you might want to walk along the South Rim Trail and take in the sites. I definitely recommend catching the sunset over the Grand Canyon. Shoshone Point is a great spot to do that without many people around. The trail to reach Shoshone Point is one mile to the point (two miles out and back). When I was here for sunset, there were only a few other people around.


Day Twelve: Mather’s Point & Bright Angel Trail
If you’d also like to catch sunrise over the Grand Canyon, I recommend visiting Mather’s Point and also walking along the South Rim Trail in that area.


After sunrise, you can head over to either the Bright Angel Trail or the South Kaibab Trail to hike as far as you’d like down into the canyon. Just keep in mind that whatever distance you hike into the canyon, you will have to hike back up and the uphill will be much more challenging. I hiked down the Bright Angel trail because it’s more convenient to get to but I’ve heard that the South Kaibab trail has better views. You do have to take a shuttle to get to the South Kaibab trail, though.
Page, Arizona
Drive Time: 2.5 hours from Grand Canyon National Park
So, you might be wondering, what’s there to see in Page, Arizona? And while the town itself doesn’t have that much going for it (other than a very tasty fried chicken restaurant), there are a ton of beautiful areas to explore nearby!
Where to Stay in Page
There are a few different places to stay in and around Page, Arizona. You have the option to camp or stay in a hotel.
Camping in Page, Arizona
If you want to camp in Page, I suggest you head to Lone Rock Beach Campground. It’s located on a beach along Lake Powell just across the border in Utah. You can drive directly onto the beach and car camp or pitch your tent. It costs $12 to camp here but there are no designated sites so you don’t have to worry about not getting a spot. Just be aware that the closer you get to the water, the thicker the sand is so use your best judgment for you car’s capabilities.
Hotels in Page, Arizona
Here are a few options for hotels in Page, Arizona:
Lake Powell Resort (luxury-ish)
Country Inn & Suites, Page, AZ (mid-range)
Lulu’s Sleep Ezze Motel (budget)
Day Twelve: Arriving in Page
If you are hungry when you get to Page, I suggest trying the fried chicken from BirdHouse. I didn’t find many restaurants that looked super exciting to me in Page but BirdHouse had good food and a nice vibe there.
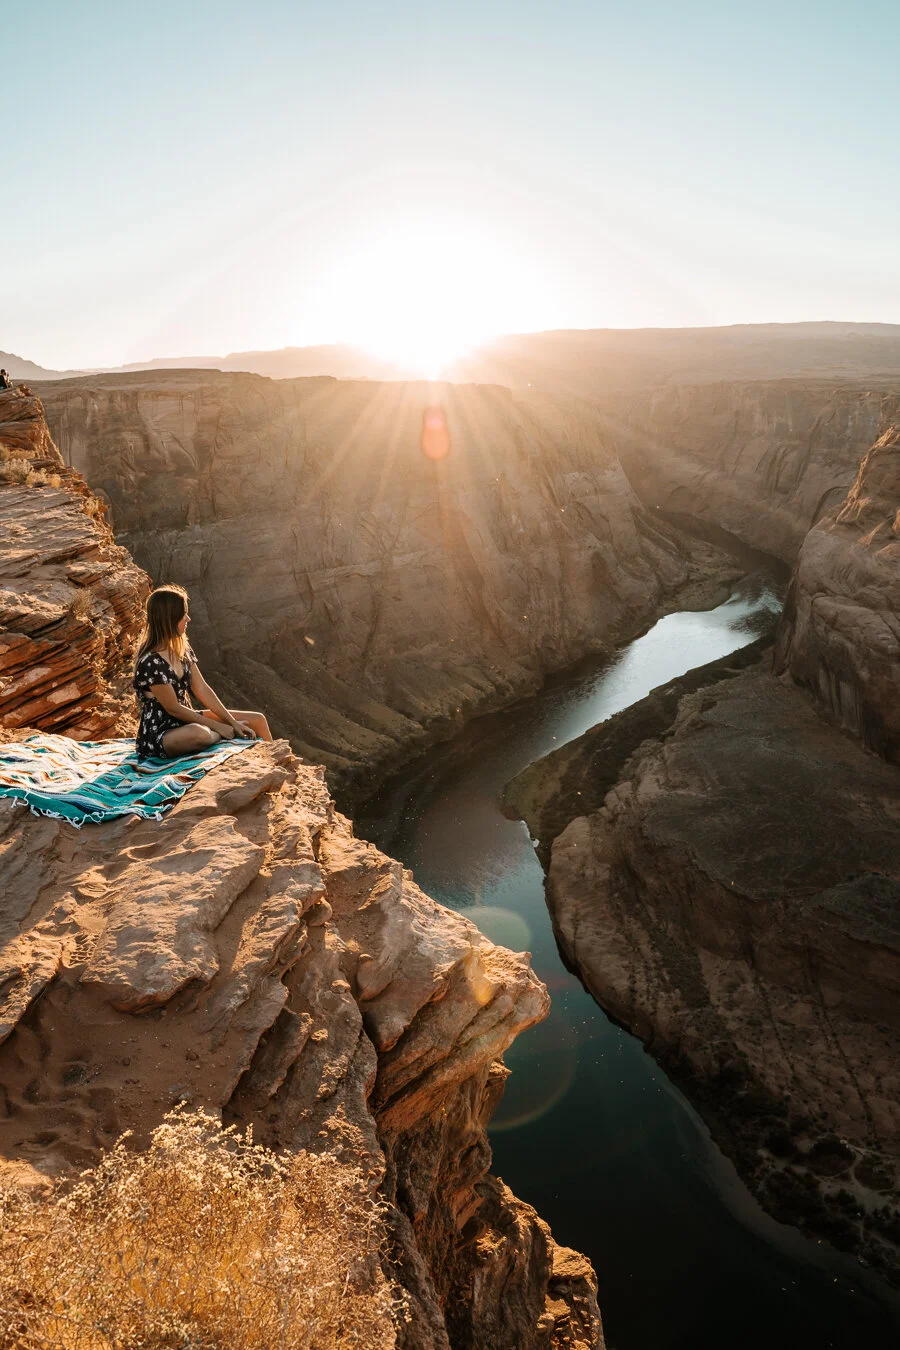
After you’ve had something to eat, head to Horseshoe Bend for sunset. It costs $10 to park in the lot and there is a short 1.5 mile out and back trail to reach the overlook. This is a very popular spot so it gets crowded but there is plenty of space to spread out and take in the view. If you want to capture the whole bend in one shot, bring a wide angle lens or stitch a few photos together (I have a tutorial on creating a panorama in Lightroom here).

Day Thirteen: Hiking Buckskin Gulch
It wouldn’t be a Southwest road trip without a visit to at least one slot canyon! I recommend you hike Buckskin Gulch via the Wire Pass Trailhead. It costs $6 per person to park at the trailhead. Bring cash or pay in advance online. Hike through the Wire Pass for about 1.7 miles until it merges with Buckskin Gulch. Take a moment to admire the ancient petroglyphs carved into the walls here. Take a right to continue further into the gulch. You can hike as far as you’d like. Buckskin Gulch goes on for another 12 miles before ending at the Paria River. I hiked up the gulch for a few miles before turning around and heading back to the Wire Pass Trailhead.
Do not attempt to do this hike if there is even a chance of rain. The canyon is prone to flash-flooding and even rain located miles away could cause water to flush through the narrow gulch.


Another popular slot canyon in the Page area is Antelope Canyon. You must book a guided tour to visit Antelope Canyon. Please note that due to COVID-19, the canyon remains closed until further notice.
Monument Valley
Drive Time: 2 hours from Page, Arizona
Currently, the Monument Valley Tribal Park remains closed due to the pandemic. There are still a few sites that can be seen here outside of the park and I will update this guide with more things to see once Monument Valley reopens.
Where to Stay in Monument Valley
There are pretty limited options for places to stay in Monument Valley but I’ll list out the few that I’ve found.
Camping in Monument Valley
I can’t really recommend a place to camp near Monument Valley because most of the camping in the area is through privately run campgrounds that are overpriced and offer very tiny sites (it’s especially bad for tent campers). I stayed at Goulding’s RV Park and paid over $30 for a tiny site, right under a street lamp, located directly next to a port-a-potty. You might have better luck here if you have a camper van or RV. It also might be worth staying at the KOA (but I can’t say if it would be better or not).
There is also dispersed camping located about an hour Northeast of Monument Valley, which I would consider if I did all of the Monument Valley activities in one day (rather than splitting it up into sunset and then sunrise). For dispersed camping, check out Valley of the Gods, located here or Mexican Hat Rock, located here.
Hotels Near Monument Valley
For hotels near monument valley, you pretty much have either The View Hotel or Goulding’s Lodge. You could also stay 26 minutes away in Mexican Hat, Utah, which has a few more choices.
Day Thirteen: Arriving in Monument Valley
When you arrive in Monument Valley, you’ll want to catch the sunset. I found a nice spot at a pull-out on the side of Highway 163, looking towards the “monuments” in the east. Basically, your options are to explore up or down the highway while everything is still closed. If you keep driving East, you’ll eventually arrive at Forrest Gump Hill, which I recommend viewing at sunrise but sunset here is nice too.


Day Fourteen: Forrest Gump Hill
Like I mentioned before, Forrest Gump Hill is the place to be for sunrise. There are a few places to pull off the highway and take the famous “road shot.” Just be careful of cars driving by. Although you can see them pretty far off in the distance, they drive fast and will not be stopping for anyone. Here’s a link to the location.


After that, you’re done with the trip! It’s a little more than two and a half hours back to Moab from Monument Valley.
Modifications
Like I mentioned before, this itinerary is a loop so you can start your trip from any point. If you have extra days to explore, here are a few places you can add on to your trip:
Los Angeles (many people choose to fly into LA so you might want to spend a day or two here if that’s where you’ll be starting)
Death Valley (this is pretty far West but might be worth it if you’ve never been or are starting/ending in LA)
Mystic Hot Springs (a nice stop between Capitol Reef and Bryce Canyon if you have the time)
Grand Staircase Escalante National Monument (there’s so much to do here including hikes, waterfalls, slot canyons
Salt Lake City (another place where people fly into)
Aspen or Carbondale (if you’re coming from Colorado)
If you have less time than two weeks, I would suggest removing a night at Monument Valley, as you can see it in just an afternoon (especially since it’s closed), or cut out the Valley of Fire. I do love the Valley of Fire but it does add on a decent amount of extra driving that can be saved if you are short on time. You can also just stop by the Valley of Fire and see all there is to see in one afternoon. My last suggestion for time saving would be to maybe remove a night in Moab and skip Dead Horse Point. Feel free to remove any other stops at your own discretion based on your own time constraints and what you hope to see most in the Southwest!
Comment below if you have any questions about this itinerary and share your own experiences if you’ve done a similar trip!