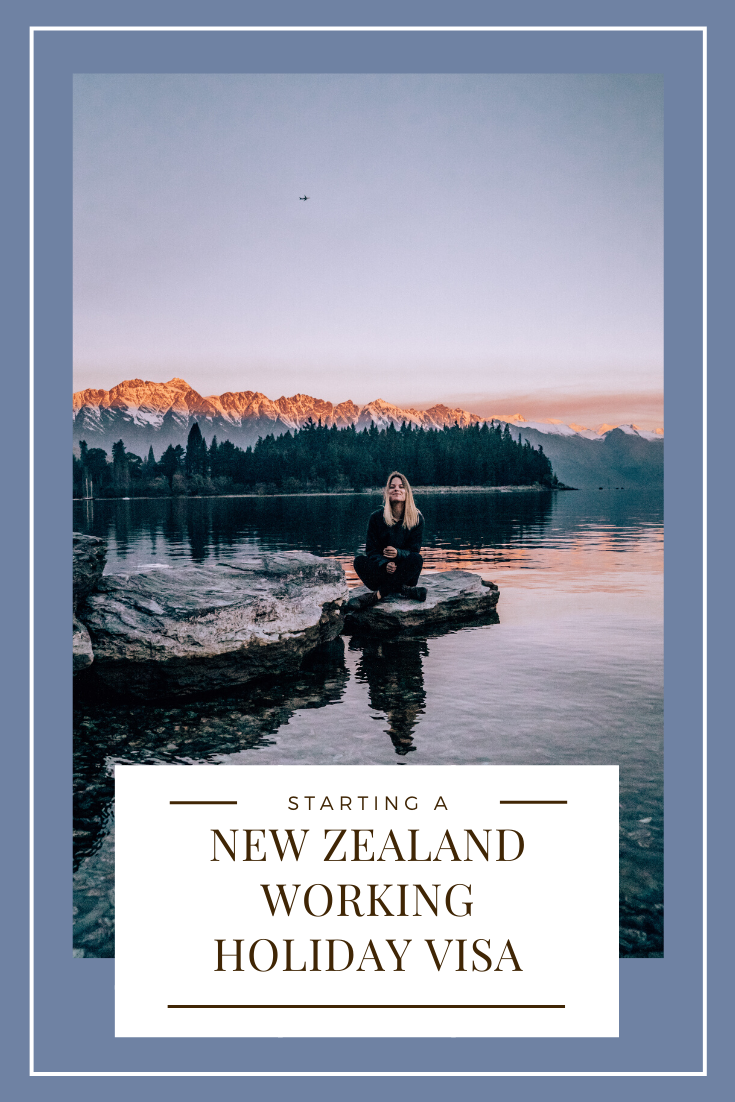
Starting a New Zealand Working Holiday Visa

Have you ever wanted to live abroad? Maybe you just graduated and want to take a gap year before going back to school. Perhaps you never studied abroad in college but always wanted to (or you did but dream about going back). Maybe you want to see the world a little before starting a career. Or maybe you just have this thirst for adventure and the idea of living abroad sounds exciting! Whatever your reason is, it’s easy to live abroad with a Working Holiday Visa! And what better country to experience than beautiful, adventure-filled New Zealand?
I have gathered all the info that I learned from starting my Working Holiday Visa in Queenstown, New Zealand and have written the following guide so that you can get out there and have the experience of a lifetime!
Please note that this article may contain affiliate links.
Before you Go
Applying for a Working Holiday Visa
Please note that this information is written for Americans applying for a Working Holiday visa in New Zealand. If you are from a country other than the United States, the process might vary.
The application for a New Zealand Working Holiday Visa is super simple and is found completely online! See if you meet the following requirements and then click here to apply!
Requirements
You must be between 18-30 years old
You must have a return ticket booked or enough funds in your account to buy one later
You need to additionally have at least NZ $4,200 to live on (you will absolutely need more than this to stay for a year in New Zealand so be sure to get a job if your funds are low)
You must have medical insurance that covers your entire stay
You need to be in good health (more on this below)
Chest X-Rays
In some cases you may need to provide evidence that you haven’t contracted tuberculosis. You will need to get a chest x-ray if you have spent more than 3 months in the last 5 years in a country that does not have a low incidence of TB (or if you live in one of these countries). The list of countries with a low incidence can be found here. If you have been in a country that is not on this list for at least 3 months in the past 5 years, you will need to get a chest x-ray.
I had to get an x-ray because I’d lived in Spain for 5 months a few years prior to my New Zealand visa and I can tell you that this process was the most time-consuming and frustrating part of the visa application.
You won’t be allowed to get an x-ray from your usual doctor. You will need to go to one of the approved panel physicians. Sometimes, the closest doctor to you may be located out of state (yikes). I had to drive nearly 2 hours (each way) to get to my appointment. Find your closest panel physician here.
Like I said before, this experience can be time-consuming. Once I arrived at the doctor’s office in Berkeley, I filled out a form and waited. Then, I was finally brought into a patient room where I waited some more, only to eventually speak to a doctor for 2 minutes (non-medical chit-chat) who handed me some paperwork and told me to drive to another location (in Oakland). Once I got to the radiology department, I waited in the waiting room for over an hour before I was finally brought back to get my x-ray taken (which only took 10 seconds) and then was handed a disk with my x-rays on it and told to drive back to the previous office to give them the disk (like, why wasn’t there a more modern way of, say, emailing this information?). On top of all that, I was told that insurance would not be accepted since there was no “medical need” for the x-ray to be taken. Some other panel physicians might take insurance if you’re lucky. It just depends on your location. I ended up paying $500.
I write this story in hopes that a decision-maker will read this and ideally make some changes to the process so that others won’t have to be as frustrated as I was driving home from Berkeley in rush hour traffic.
Submitting Your Application
Before you submit your application, make sure your name is exactly the same as it is on your passport. We got super delayed at the airport on our way out because Nico’s passport showed his middle name but his visa did not. Because of this, it appeared that Nico didn’t have a valid visa even though it had been approved long before. Luckily it all worked out in the end but save yourself some stress and triple check everything ahead of time!
After your application is submitted, it will take only about 27 days to process! Someone will email you if you need to provide more information (such as a chest x-ray). Even with your visa approved, your year in New Zealand doesn’t start counting down until you enter the country.
Deciding Where to Live
While some people choose to spend their year in New Zealand in one location, others decide to travel around and live and work in multiple locations. The latter is made possible with seasonal jobs (such as farm work or ski resort jobs) or you can check out a gig website such as HelpX, Wwoof, or WorkAway. I even met a decent amount of people who lived in camper vans instead of renting a room (more on this later). I lived in one place in New Zealand (Queenstown) but still had the opportunity to travel around and see a lot of the country. If I were to go back and do things differently though, I would try to live in more than one location.
New Zealand is divided between two islands - the North and South Island. If you want to live primarily in one location, it’s a good idea to pick the island with the most locations you already know you want to visit (although it’s easy to travel between the two and you definitely should!) or the island that can offer the most of the lifestyle you’d like. The North Island is more populated than the South and tends to have more opportunities for jobs outside of the farming and hospitality industries. The South Island is more mountainous and the towns can be quite small. I would choose to live on the South Island if you have an interest in adventurous activities, prefer less crowded towns, or enjoy winter sports. I would pick the North Island if you prefer city life, have a low tolerance for the cold, or want a job in a field other than hospitality, farming, or engineering (though you can find those types of jobs on the North Island as well).
Read on to find out more about some of the major towns and cities…
Auckland
Auckland is probably the most well-known city in New Zealand and has the largest population. It has tons of great food and is a short drive from many beautiful natural attractions such as volcanoes and beaches. Auckland would be a great place to base yourself if you love city life, are looking for inexpensive rent, and want lots of different possible job options.


Wellington
The capital of New Zealand, Wellington is the second most populated city in New Zealand but is much more compact. It’s a very walkable city and the CBD (downtown) is full of cute restaurants, bars, and coffee shops. I felt that Wellington had a bit more of a personality than Auckland. I will say that the wind in Wellington can be quite intense (the city is nicknamed Windy Welly afterall). Sometimes it’s so strong that it’s better to just stay inside. Wellington is located on the southernmost tip of the North Island, so it’s a great place to be if you plan to do a lot of travel in between the islands.


Christchurch
Christchurch is the largest city on the South Island. In 2011, New Zealand was hit by a large earthquake, which caused a lot of damage in Christchurch. The city is slowly recovering but some of the major areas of destruction have undergone urban renewal and resulted in trendy places to hang out, shop, or eat & drink. Christchurch is located in a relatively flat part of the South Island (in the Northeast) but is a short drive to places like Akaroa, Kaikoura, and Marlborough Sound.
Queenstown
Also known as the “Adventure Capital of the World,” Queenstown is home to the world’s first bungee jump and offers plenty of other adrenaline-pumping activities from jet boating to heliskiing. Queenstown is a mountain town so it’s a great place to live if you want to work at one of the ski hills like the Remarkables or Coronet Peak. This also means it’s a very touristy town. There will be plenty of jobs in tourism or hospitality here, so if that’s the kind of work you’re interested in, Queenstown is a great place for you. While finding a job here is relatively easy, finding housing can be a bit more difficult. Queenstown is the most expensive area to live in New Zealand (due to the lack of housing and the steady increase in population) but that doesn’t mean that it’s impossible to find a place to live, you just have to be willing to be a little flexible and persistent. I’m going to write a more detailed blog about Queenstown and will link it here!
Also, you may consider Wanaka, a town located about an hour from Queenstown. It’s smaller and slightly less touristy (or at least a bit less full of backpackers) but has a similar mountain town vibe to Queenstown.


Packing
What you decide to bring to New Zealand will largely depend on your personality and what activities you like to do. If you’re planning to stay the whole year, pack clothes for all seasons. The winters in New Zealand can be quite cold and the summers can be very warm. Nico and I brought our snowboards with us because we knew that we wanted to hit the slopes! If you don’t want to deal with hauling all your gear, though, it’s easy to find inexpensive, used items after you arrive.
I suggest bringing your laptop if you have one. This will make job searching and looking for housing easier. Also, a camera is a must! New Zealand is probably the most picturesque country in the world.
If you’re big into backpacking or camping, you could consider bringing some outdoor equipment with you. There is a decent amount of this stuff for sale second hand in New Zealand but if you want good quality items, I found that new gear in the US tended to be cheaper. I also found it hard to find an affordable camping pad that wasn’t a thin piece of foam.
I know everyone says this but seriously - pack light! You might end up in a situation like me where your flight to New Zealand allows a lot more checked baggage than your return flight. Plus, you’re bound to pick up a few new items during your travels. My Hawaiian Airlines flight to New Zealand was awesome and let me bring two complimentary checked bags weighing up to 70 lbs each. Nico and I ended up bringing one large bag each plus a snowboard bag with both of our gear. On the opposite side of the spectrum, my friend, Ang, only brought a regular sized duffle and a small backpack. In the end, she had a much easier time traveling back home since she had less stuff to begin with.
Insurance
Travel insurance is a requirement for your work holiday visa. Although nobody asked for proof when we submitted our visa applications or upon check in at the airport, it’s better to be safe than sorry and travel insurance is super cheap! OrbitProtect is the best option for your New Zealand Working Holiday Visa. I only paid NZ $327 for the entire year and it really came in handy when I had to get stitches in my knee (I’ll save this story for a future blog). Here’s a link to OrbitProtect!
You can buy the insurance ahead of time and it will even protect your items during travel. Nico and I purchased our insurance in the airport on our way out because we’re procrastinators but it was such an easy process and we had no issues!

After you Arrive
When you first arrive in New Zealand, it’s a good idea to spend a few days in your arrival city (likely Auckland) to get yourself started with a cell phone, bank account, and IRD number.
Bank Appointment
When you land in New Zealand, your first order of business (besides checking into your hostel or Airbnb and grabbing some food) will be to get your bank account set up. You may want to look into setting up an appointment ahead of time because the banks (especially in Auckland) can get pretty booked out. The main banks you have to choose from are ANZ (get used to pronouncing “z” like “zedd”) and ASB. I read that ANZ is the best so I went with that and have no complaints!
When you go to your appointment, you will need your passport and a proof of address. If you’ve already signed a lease (by some miracle) you can use this as proof but most likely you haven’t so your hostel will be able to print something out for you. Nico and I stayed at an Airbnb and the reservation with my name on it was proof enough.
Transfering Money
This doesn’t need to be done right away as your US cards should work fine in New Zealand, but you may want to transfer some money to your new bank account to avoid ATM fees and to get yourself started with housing or a car. It can also take a few days for your money to transfer so it’s best to not put this off. There are a few different ways to transfer money but I recommend an app called TransferWise because it’s the quickest and cheapest. I recommend you get this app setup before you leave the US in case your bank needs to send you a text verification code to transfer money.
Here is a link to get your first TransferWise transfer for free!

SIM card or cell phone
You’ll definitely want to have a working phone during your time in New Zealand. There are a few different carriers available but I recommend Spark. If your phone is unlocked, you can just buy a SIM card and put that into your current phone. If not, you can just purchase a cheap phone from Spark. The SIM card will give you a new phone number. To make things easier, I just asked them to use my US number but with a different country code and area code. I recommend buying a pay-as-you-go plan to keep things simple and so you won’t have to worry about canceling a phone plan when you leave.
Getting an IRD number
An IRD number is like your social security number. You will need to have one set up before you can begin work so it’s important to get started on the process as soon as possible. If you don’t have a bank account yet, set that up first since you’ll need one in order to get your IRD number. Here is a link to the application. Once you have printed and filled out the form, you will need to get a bank statement showing at least one deposit and one withdrawal from your account. After that, you will take these two documents to either a post office or an Automobile Association to be processed.
Where to Stay
You will need to have a place to stay when you first arrive in New Zealand and when you’re looking for housing. If you are traveling solo, I suggest booking at least a few days at a hostel before you set off for New Zealand. You can usually extend your stay after you arrive if you need more time. Hostels are great for solo travellers. You will meet others who are in a similar situation as you are, which can be really comforting when moving abroad to a new country!
If you are wanting to have your own space, I recommend booking an Airbnb. There are plenty of cheap options and Nico and I found an apartment to stay in right in downtown Auckland within walking distance of all the places we needed to go.
Some people choose to stay in hostels for the entirety (or majority) of their visa. If that sounds like something you’d like to do then go for it! I personally wouldn’t choose to live that way but it’s actually more common than you’d think. If you want to avoid hostel living, there are plenty of other options. Take a look at the local Facebook groups for the city you want to live in. There will often be posts for temporary or long-term rooms for rent. Since it’s pretty difficult to find housing in Queenstown, Nico and I first found a temporary room to live in until we found a more permanent location. If you are looking for a place to live in Queenstown, the page you should check out is called For Rent in Queenstown, New Zealand. There will probably be similar pages for whichever city you want to live in!
Be sure to be careful when looking at rooms on Facebook. Most of the options are sublets so the head tenant could be bumping up the rent to make a bit of profit or you won’t be asked to sign a lease, which could result in you losing your deposit for damages caused by previous tenants. While situations like this are possible, it’s common practice to sublet rooms in New Zealand so you’ll most-likely be fine. Just be sure to compare prices to make sure you’re not being ripped off and be smart about your choices.
Another great site for finding housing is called TradeMe. It’s kind of like Craigslist or Ebay. This is a bit more official so you will likely be dealing with the landlord directly. This is a good option if you plan on staying in one area for a while or have friends to go in on a house with.
Finding Work

Finding a job in New Zealand will vary depending on the area where you’re looking for work and the field you’re in. Seek is a popular career site and is a good place to start researching jobs. Otherwise, there might be a local news source in your area that also lists jobs (such as Queenstown’s Lakes Weekly Bulletin).
I found that the best way to find work is to just get out there with your CV (resume) and walk into the businesses that you want to apply to work at. This especially works for customer service jobs since the managers will want to put a face to a name and see how you interact with others.
Finding a job was pretty easy for me in Queenstown (and I imagine in other areas as well). There’s definitely a shortage of hospitality workers so you will likely be hired for a position even with little experience. For example, I was hired as a waitress even though I hadn’t waited on tables before (I’d been a hostess and worked events previously). Nico was hired as a bartender at a beer bar even though he didn’t have bartending experience.
A few other professions that New Zealand is in shortage of workers for are construction, engineering, healthcare, science, and trades. Farming is another common one and some Working Holiday Visas for other countries require farm work as a qualification to extend the visa.
Other options for looking for temporary or seasonal work include HelpX, Wwoof, or WorkAway, which I mentioned earlier. These options typically offer accommodation, food, money, or a combination of the three in exchange for work (often farmwork or house sitting).
Other Tips
Buy a car or a van so you are incentivised to get out and travel! My friend Ang bought a car for just NZ $1000 and sold it for about the same price at the end of the year.
Don’t get too caught up in work! This is a Work Holiday visa not just a work visa! New Zealand can be a difficult country to save money in. I left New Zealand with barely more money than what I started with (granted, I did travel for a little over 2 months and lived in the most expensive city in the country). If you go with the mindset that this trip is all about the experience, you’ll have a great time!
Renting a car in New Zealand is also cheap! Sometimes even FREE! Check out transfercar.co.nz to see what I mean. You know when you rent a car and drop it off in a different location than where you started? Transfercar helps get those cars back to their original location by renting them for free or super discounted!
Pin For Later